In the images below, you can see a variety of mugs that were made using Maya. I have some previous experience with Maya and the interface from projects that I did during my Foundation Year to practice 3D modelling, however, I needed to refamiliarise myself with the software due to not using it for a long period of time.
PRIMITIVES AND EXTRUDING
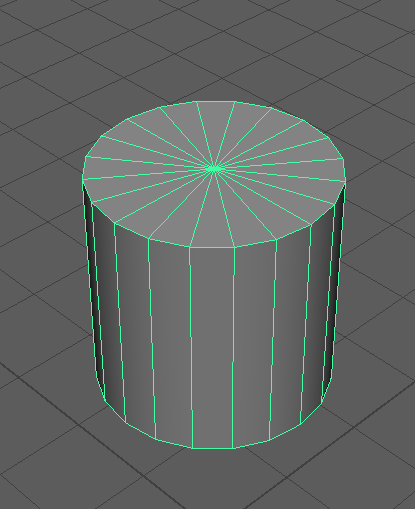
This project started with the use of a primitive – a simple 3D shape that can then be edited through the attribute window and manipulated within the space. For this project specifically, I used a cylinder primitive as this would provide a simple shape of a mug.
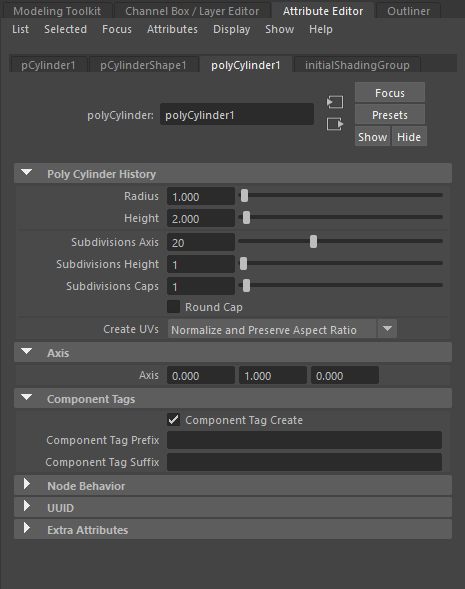
The top and the bottom faces of the cylinder, known as ‘caps’, are comprised of triangles. As the aim of this project was to make a mug, I needed to remove the top face of the cylinder to create a recessed space within the model. The top of the cylinder was removed by editing the value of the Subdivisions Caps within the attribute editor window. The value was changed from 1 to 0, which changed the way in which the caps were originally being formed into one large shape.
Once the top cap of the cylinder had been removed, the next objective was to provide thickness to the cylinder. This was to provide an aspect of realism to the 3D model, as the faces of the model were paper-thin. I proceeded to select everything within the scene and made use of the extrude tool (Ctrl+E) to manipulate the faces of the cylinder into becoming thick walls instead of remaining paper-thin. In retrospect, the model could have remained paper-thin, as the model would still resemble a mug, yet I had an aim to make the model have aspects of realism to it which led to this decision.
Additionally, edge loops were applied to the cylinder, which would allow me to manipulate and edit individual faces of the cylinder rather than the entire shape. In the image below, one edge loop can be seen on the cylinder as a demonstration, whereas the mug upon completion had several.
As I was still refamiliarising myself with Maya and its interface, I decided to experiment with the possibility of different handle shapes that I could attach to the mug. Initially, I experimented with a torus primitive, editing the radius and the subdivisions to continue with the aspects of realism in the model, yet ultimately decided against this in order to further explore and experiment with different design ideas.
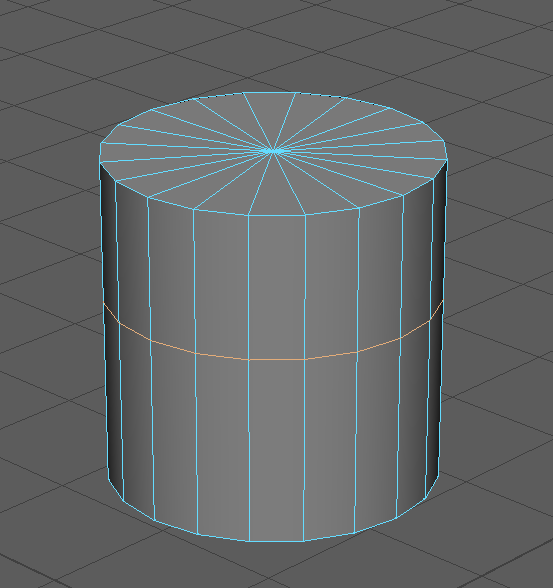
The handle in the image below is a cube primitive that has been manipulated and attached to the model of the mug through the use of the target weld tool. The cube was rescaled to a similar size to the mug and several faces were extruded and removed in order to create a hollow area in which a person would be able to hold the handle.
As mentioned above, the target weld tool was used to merge the newly formed handle to the body of the mug. The target weld tool connects the desired vertex or edge and bridges them to another vertex or edge, which creates a more realistic view rather than the shapes clipping within each other (Autodesk, 2021).

IMPROVING AND EXPLORING FURTHER
I wanted to take this project a step further and improve on the first mug design. The first mug design was rudimentary in its design, with no key features on the model to draw the eye of the viewer.
In this design, I wanted the mug to be square, as this would allow me to divert from the common cylindrical shape of a mug whilst also being able to practice using the extrude tool on different primitive shapes. I also wanted to incorporate a small design onto the mug, which would help draw the eye of the viewer to the model and additionally refamiliarise myself with the software. By repeating the steps taken to create the first mug design, I had manipulated the cube primitive to have a recessed space, thick walls and a modified torus primitive attached to the side through the use of the target weld tool.
On each side of the model, I added cube primitives that had been rescaled and stretched to act as the design of the mug. I wanted the mug to feel as if it was handmade, and these cubes attached to the side of the mug were holding it together, in a similar way to how metal hoops hold the wooden staves of a barrel together.
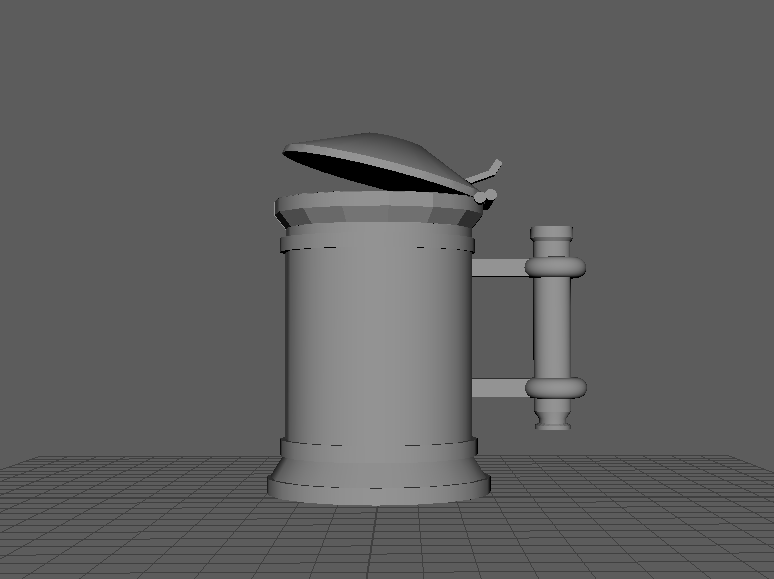
Once I had created two mug designs, I wanted to explore Maya even further to practice 3D modelling. I settled on creating a Tankard, as I felt that it was thematically close to creating a mug, but with a design that was increasingly complex in comparison.
I used a cylinder primitive to act as the body of the tankard and applied edge loops to the shape, as this would allow for a flared effect that can be seen in tankards and steins that can be bought. I created another cylinder primitive and rescaled it to become the base of the tankard, whilst additionally duplicating it (Ctrl+D) to replicate the effect of a metal hoop on a barrel, mentioned above.
The handle section uses two cube primitives and a torus primitive to become the bridge between the section that a person holds and the tankard itself. I connected the cube primitives to the tankard by removing two faces from the body of the tankard, which left vertexes exposed to target weld the primitives to. This was then repeated with the torus primitives to ensure that the shapes were connected. The main handle itself is a cylinder primitive that had multiple edge loops applied and several faces extruded to make the handle appear as though it has been hand made and rotated through a machine.
Originally, I had planned to leave the model without the lid to make it visually appear more like a mug, yet decided to go a step further by adding a lid to the model, which was created by rescaling a cone primitive that had a bevel applied. Additionally, I extruded a face from the cone primitive to act as the lever that can be seen on most tankards, which would allow for the lid to be opened with a single hand.
Sketchfab link: Tankard 3D Model – Maya Test
OUTCOME
Overall, I’m relatively happy with how these models turned out – I was able to create a simple mug design during the beginning of the project as I refamiliarised myself with Maya and its interface and continued even further to create progressively more complex designs. The model could have been improved with the addition of different materials, colours to add more life and vibrancy to the model compared to the white material applied.
Referenced Material:
Autodesk (2021) Target Weld Tool | Maya 2022 | Autodesk Knowledge Network. knowledge.autodesk.com. Available online: https://knowledge.autodesk.com/support/maya/learn-explore/caas/CloudHelp/cloudhelp/2022/ENU/Maya-Modeling/files/GUID-16CEC87A-F927-4AED-9B60-A772481F8FD4-htm.html