This task saw us create a small scene in Autodesk Maya, consisting of a table, a table cloth and a bowl, making use of various tools within the Maya interface such as the different Curve Tools, extruding along a specific pathway and how to create surfaces using the Loft tool and the Birail tool. As previously mentioned, I have some experience with Maya and the interface, yet this was my first experience with using NURBS so it was an interesting challenge to overcome.
CREATING THE TABLE
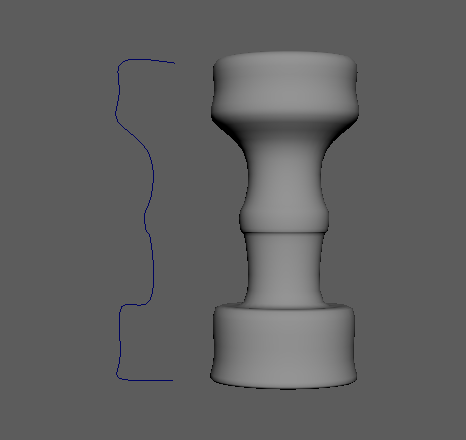
This project started with the use of the Curve Tools in Maya, specifically making use of the EP Curve tool in the image below. The EP Curve tool allowed me to freely plot out a curve of my choosing, whereas using the CV Curve tool determines the curve after a set number of points have been plotted.
I wanted the central leg of the table to look as though it was strong and sturdy to support the tabletop. This was done through the NURBS EP Curve tool, allowing me to create a curve that had a large base and top with some minor detailing in the centre that I could use in coordination with the Revolve tool. The Revolve tool essentially creates a surface by rotating the curve infinitely around a specific anchor point to create faces that the user can interact with. Initially, the revolved NURBS shape appeared black, which indicates that the model is built incorrectly, with the interior faces displaying on the exterior. I discovered that I could fix this issue by reversing the direction that the faces were rendering in the curves menu (Curves – Reverse Direction), making the exterior appear in the grey lambert material.
Once I had the central table leg created, I moved on to creating the tabletop. I decided to use a cylinder primitive, rescaling it to the desired thickness and editing the radius through the attribute editor to create a more circular shape. I applied additional edge loops to the side of the model and through manipulating verts and rescaling the central loop, I was able to allow add small detailing to a relatively dull model.
I was relatively happy with the design of the central table leg and the small detailing on the tabletop and decided to connect both shapes together. In order to merge both the shapes together, I had to ensure that they were both of the same mesh type – polygonal. Whilst the tabletop was already polygonal, I had to convert the central table leg from NURBS to polygons in order to begin connecting them together.
EXPERIMENTING WITH THE LOFT TOOL AND BIRAILS
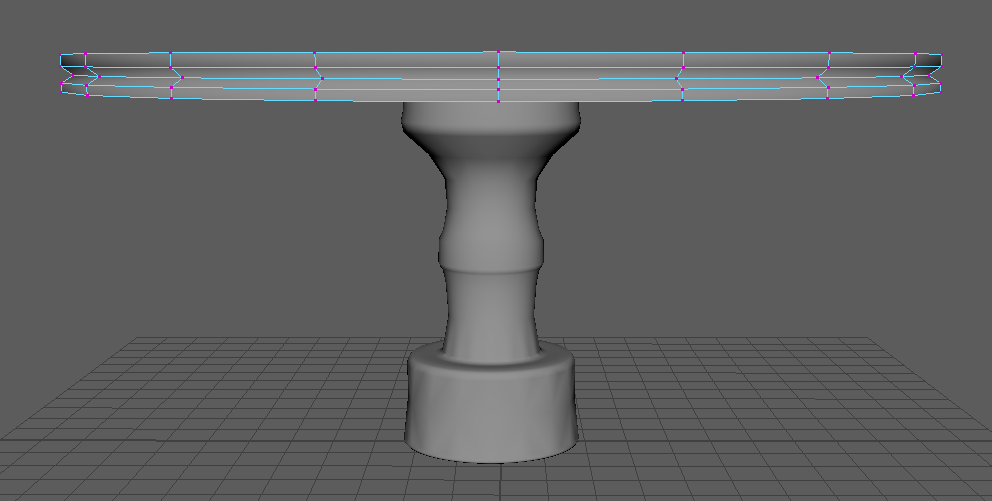
For the creation of the table cloth, I experimented with using the Loft tool and the various Birail tools to replicate and mimic how the cloth would behave. The Loft tool can create a surface from two curves created by the user, which can be seen in the image below.
As this is my first time working with NURBS within Maya, I didn’t want to overwhelm myself with creating an incredibly detailed tablecloth as I was relatively new to these new additions. I created two EP curves in order to create the lofted surface that was to become my tablecloth, which I placed on the top of the tabletop after converting the surface from NURBS to polygons. Once the surface had been converted to polygons, I could manipulate the faces in the same manner as manipulating poly modelling primitives. I selected a number of verts and moved the positions in order to make the table cloth appear as though it was reacting based on the shape of the table, else the surface would remain rigid.
I briefly experimented with using the Birail 1 Tool, which can create a surface based on three curves. I found the Birail 1 tool to allow for more control on how the surface looks in the centre, rather than simply bridging the area between the two curves, yet increasingly more difficult in comparison to using the Loft tool. In the future, I will likely experiment with the Birail tools more, yet at this stage in my 3D modelling experience, I wanted to remain relatively simple.
The final part of this model was to create a bowl, which I created by following the same steps as the central table leg (EP Curve and Revolve). This model could be improved further, such as by having the table cloth encompassing the entire table rather than only the central section, adding detailing to the bowl and experimenting with materials.

IMPROVING AND PRACTICING
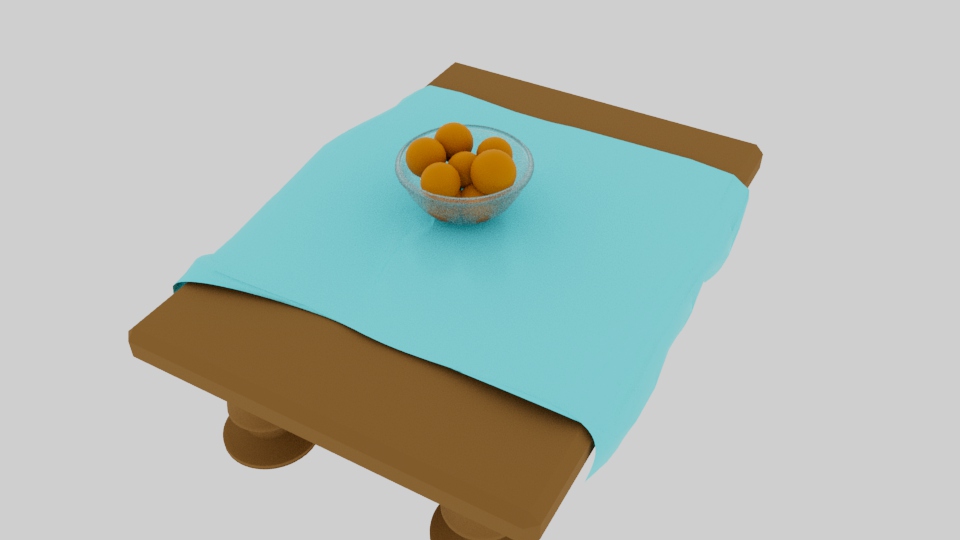
I wanted to improve on my first table model, which was rather simplistic and minimal and create a second table model that had significantly improved detailing and further practicing my skills with Maya.
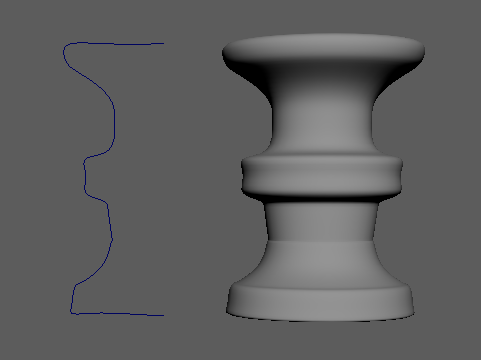
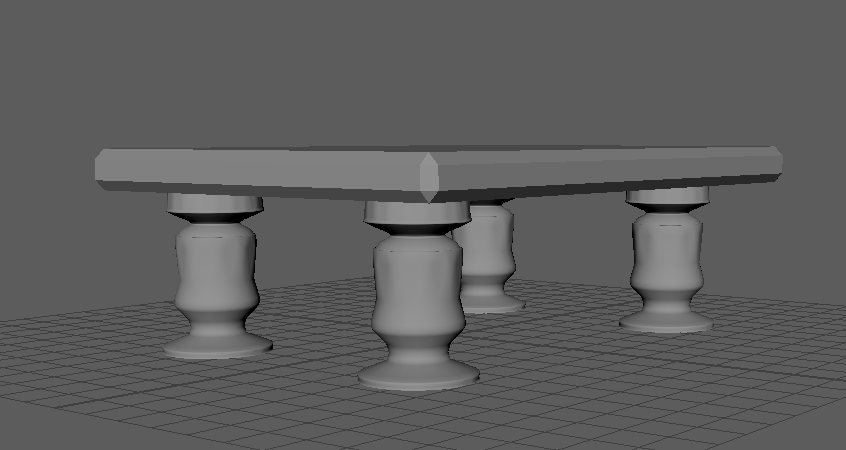
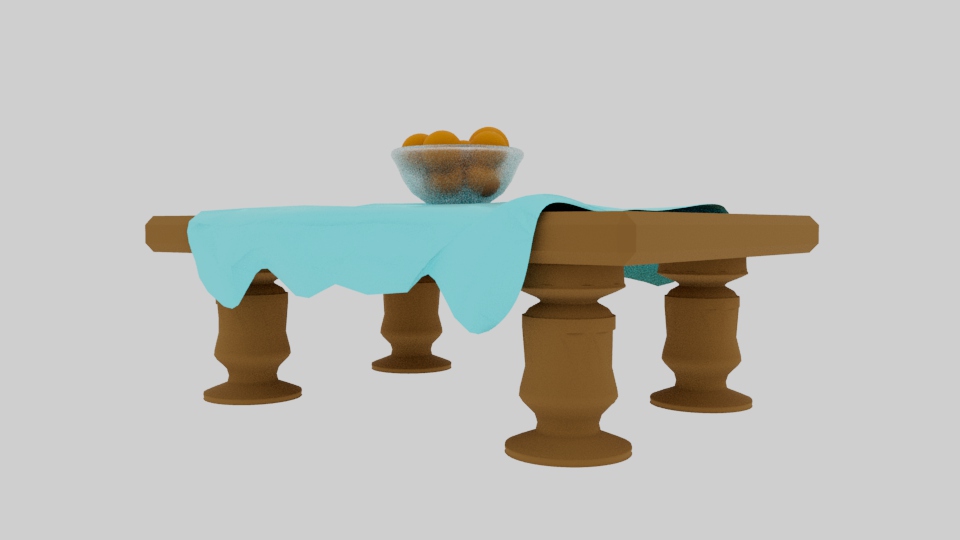
As seen in the images above, the first model of a table that I created for this task only had one table leg that was placed in the centre – I wanted this model to follow a similar design to the first, which led me to create a curve that appeared relatively strong with a large base and top to support the tabletop, whilst the central section of the table followed a cylindrical appearance, almost mimicking the structure of marble columns.
I used a cube primitive for the tabletop, following the same steps used in the first model to achieve the desired thickness for the surface. I didn’t want the table to appear unmanoeuvrable, awkward and unsightly, which led me to use the bevel tool on the primitive to make it appear as though the top surface had been made smooth through the use of machinery.
The table cloth for this model was created using six EP Curves and the loft tool, allowing for more verts to be manipulated to create small folds and creases in the material based on the tabletop shape. I found myself using Game Dev Academy’s YouTube tutorial on how to use Curves and NURBS in Maya and found myself feeling increasingly confident in comparison to where I started (Game Dev Academy, 2020b). Furthermore, I wanted to create a fruit bowl for the centre of the table that actually had items/fruit within it – as the bowl in my first model had nothing. I followed the same steps taken in the first model and created a bowl that was scaled in proportion to the rest of the environment and used sphere primitives to act as oranges within the bowl, ensuring that the sphere model was not appearing outside the bowl itself.
Additionally, I decided to explore Maya’s rendering system, specifically rendering with Arnold. I followed Game Dev Academy’s tutorial on how to create materials in Maya and how to apply them to my scene, as this was something that I had not had the chance to learn yet (Game Dev Academy, 2020a). This was an interesting experience, as there were some elements in Maya’s Hypershade that were similar to creating materials in Unreal, so I didn’t feel entirely unfamiliar with the process.
OUTCOME
Overall, I’m happy with my second table model, as it shows a table, cloth and a bowl that have made use of the various tools in Maya’s interface and an improvement on both the first model and on my skills in 3D modelling.
Referenced Material:
Game Dev Academy (2020a) How to Create a METAL Material in Maya with aiStandardSurface | Maya 2020 Tutorial for Beginners. www.youtube.com. Available online: https://www.youtube.com/watch?v=lYXjldEDW-s&list=PLsPHRLf6UN4k0_AfrTzLmK4iDV9J97-qR&index=32 [Accessed 21 Feb. 2022].
Game Dev Academy (2020b) Modelling Using CURVES & NURBS in Maya Pt. 2 – Loft | Maya 2020 Tutorial for Beginners. www.youtube.com. Available online: https://www.youtube.com/watch?v=ybm-88E1ttA&list=PLsPHRLf6UN4k0_AfrTzLmK4iDV9J97-qR&index=28 [Accessed 21 Feb. 2022].