This task saw us create two crates within Autodesk Maya, one with had a high polygonal count and another that had a low polygonal count to demonstrate our understanding of creating high-quality models and manipulating them into game-ready assets.
CREATING THE HIGH POLY CRATE
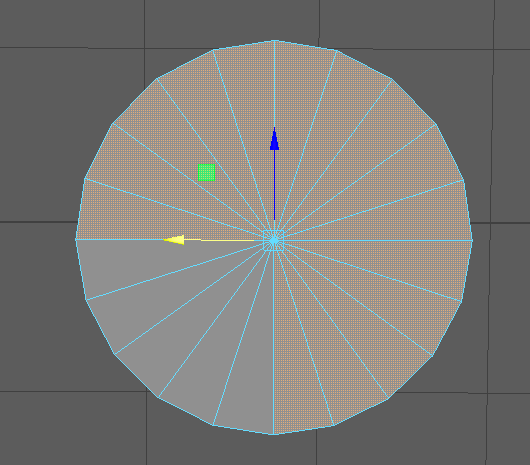
The project started by removing three-quarters of the face of the cylinder, leaving a quarter of the face to manipulate into becoming the handle for someone to hold. As I was working within the top view of Maya, I had to swap between different viewports, removing the sides that had remained to ensure that only the quarter face was remaining to work with.
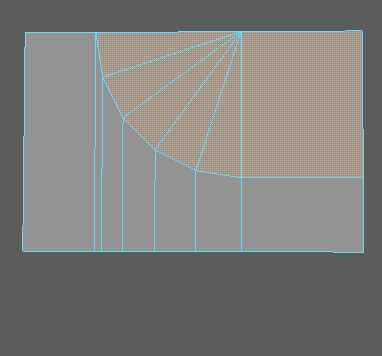
With the remaining quarter of the cylinder face, I was able to extrude the edges of the shape out to create one side of the surrounding panel for the handle. From this, I then removed the faces highlighted in the image below to create a hollowed-out, smooth area to become the handle area.
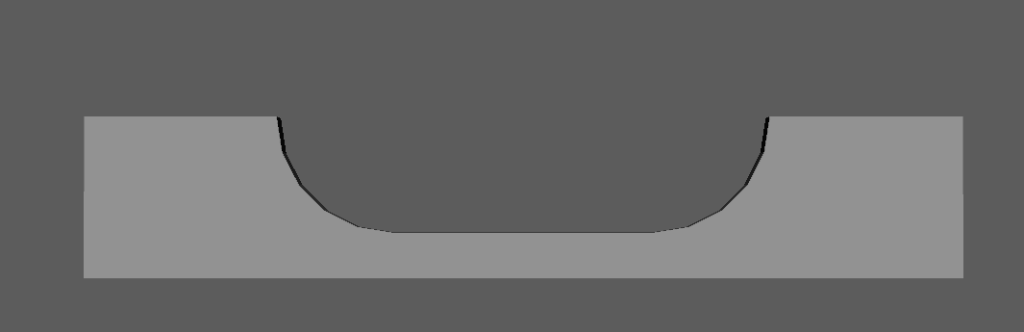
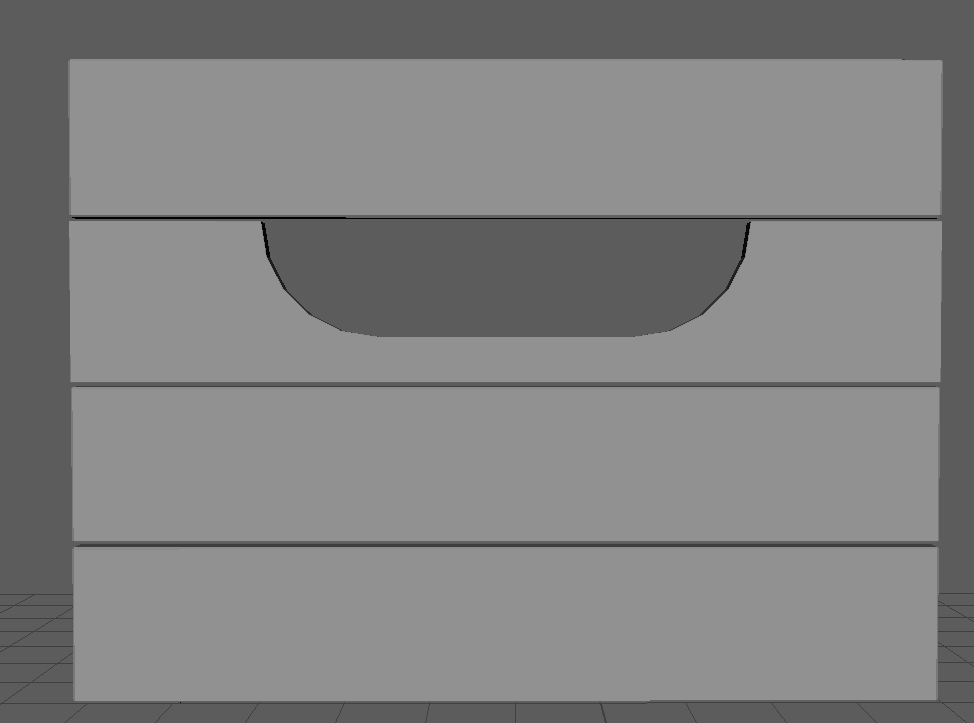
As I had only created one side of the handle shape, I had to create the other side. This was done through the use of Maya’s mirror tool, which duplicates the mesh across an invisible plane and how it is mirrored within the space (Autodesk, 2021). In the image below, the initial side of the handle shape is seen to be reflected on to the other side, whilst also being extruded to make the shape have strong, thick walls instead of paper-thin.
To create the entirety of the crate front seen below, I modified a cube primitive to the dimensions of the handle section to become the other panels. By selecting the verts of the primitive, I could snap them into position to ensure that the shape was the same width and length. Prior to starting this project, I had been attempting to make sections of my 3D models the same dimensions through the use of Maya’s rescale tool and loosely guessing whether the shape was the same, which meant that there were often imperfections in the model.
Once I had created one panel, I applied a bevel to make the panel appear as though the edges had been smoothed by machinery. Once I achieved the desired bevel effect, the modified primitive was duplicated twice to create the remaining faces for this side, with the inclusion of a small space between each panel to replicate the gaps seen on wooden crates.
The sides of the crate are made from the modified cube primitive that is featured above. I used the snapping function for the rotation of the panel to ensure that the cube primitive had rotated to exactly 90 degrees and then proceeded to manipulate it further. As the sides of crates are typically longer than the handle sides of the crate, I had to extend the panel by selecting the verts on one side of the primitive and moving them to the handle side of the crate.
This individual panel was then duplicated multiple times to create a side panel, following the steps taken in creating the handle side to replicate a wooden crate. I could now essentially assemble the shell of the crate from the two pieces that I had by creating duplicates of both sides and snapping them into their respective places. The bottom of the crate is a cube primitive that has been rescaled to a flat surface, which I ensured was in the correct position by using the top view and changing the shading mode to x-ray, allowing me to see through the existing objects in the scene.
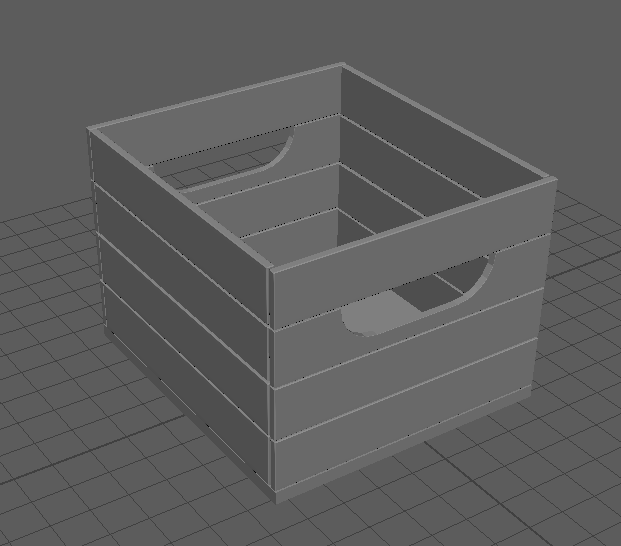
I wanted to create some metal covers for the corners of the crate, as realistically if someone were to pick this crate up, it would fall apart due to having no support for the panels. I used a second cube primitive and applied edge loops to remove a section of the shape, as it would otherwise overlap and show through the existing panels. This was then mirrored and duplicated onto the other corners of the crate.

At this stage in the project, I started to have some issues with Maya. I had some minor problems to fix whilst making the crate, such as a face displaying incorrectly which I could solve by reversing the face, yet I began to have major issues with extruding, mirroring and moving the shape into place. The metal corner would not mirror, attempts to move verts downwards would cause the face to jolt sidewards instead and extruding a selected face would also extrude a random face that was not selected.
CREATING THE LOW POLY CRATE
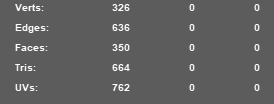
The creation of the low poly crate followed the same steps as the creation of the high poly crate, with a few changes at certain steps. I used the target weld tool on the crate to lower the polygon count for this model, moving verts to corners and removing redundant edges to change the way the faces are formed, as seen in the wireframe comparison below.
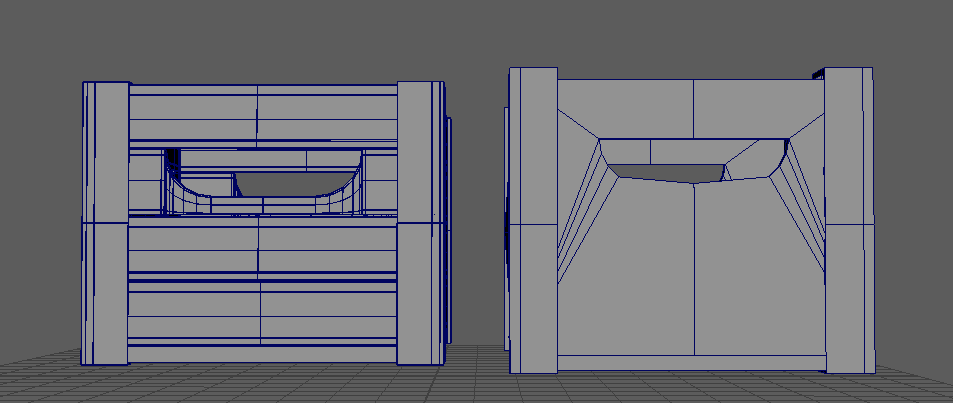
I had multiple issues with the creation of the low poly crate in comparison to the relatively simple creation of its high poly counterpart. In the wireframe comparison, I could not delete the central edge regardless of my efforts, which caused the front face to pinch at certain areas. The sides of the low poly crate had warped along the centre, causing the centre of the panel to protrude further than the top and bottom and the metal supports for the corners of the crate faced a similar issue.
REFINING, IMPROVING AND EXPLORING
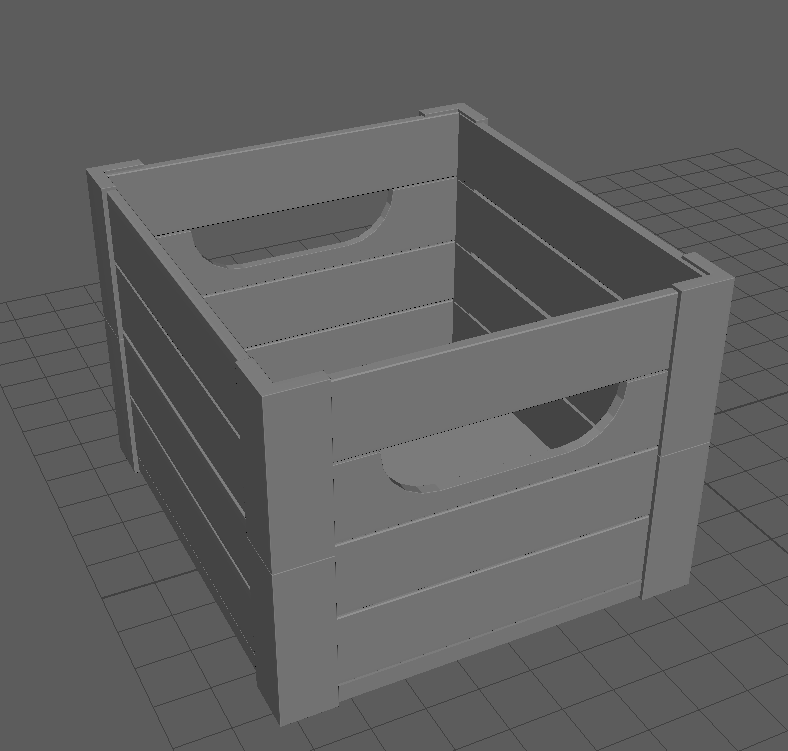
I decided to reattempt creating the low poly crate model, as the first model had multiple issues that I did not know how to fix and I knew that I could improve on it with more time and effort. In the image below, this version of the crate does not have any pinching down the centre of the front of the crate and the side faces remain rigid, with no protrusions along the centre. Additionally, this version of the crate had a lower poly count than its predecessor.
For the purposes of displaying the newly improved version of the crate, I duplicated the faces to create a shell, whereas the Maya file has these faces separated for the purposes of baking and using the model later in UV unwrapping.

I also decided to explore Arnold rendering within Maya further. I briefly explored this when creating the table scene with NURBS tools and wanted to see how I could apply what I had previously done to the crate model.
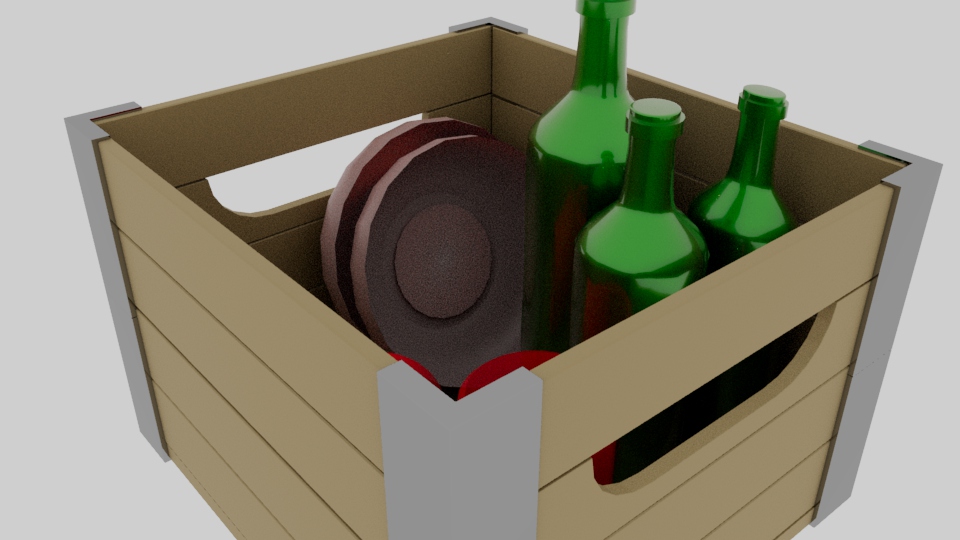
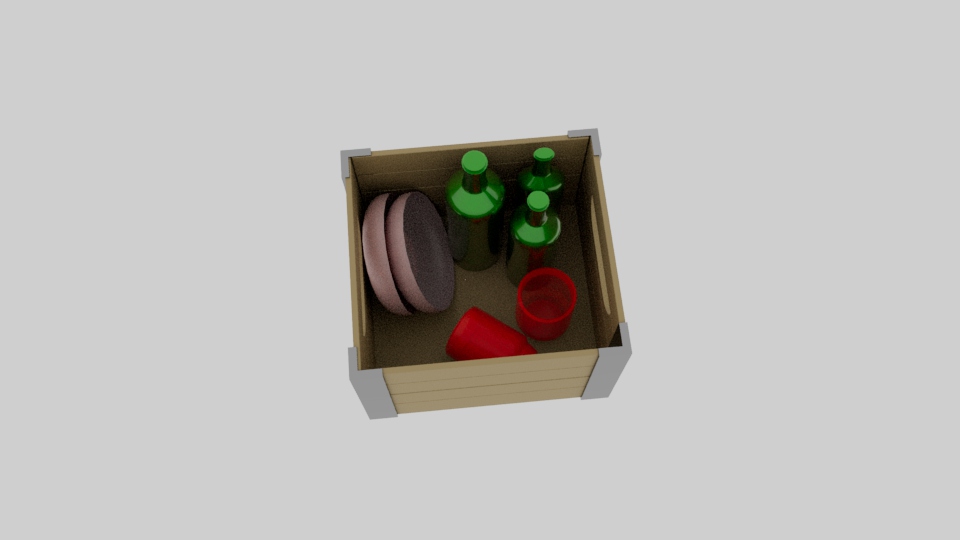
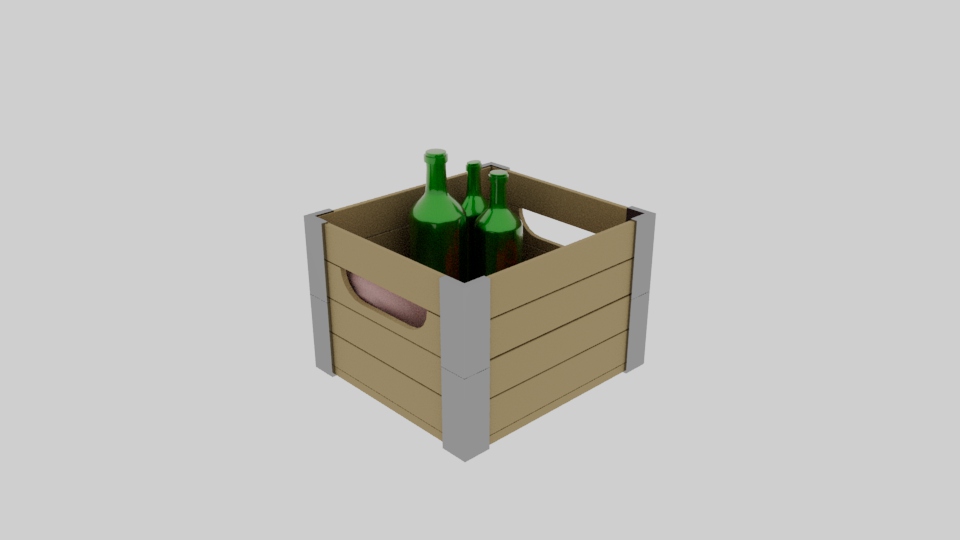
I copied the high poly crate onto a new Maya file, ensuring that any changes that I was going to make would not affect the initial models. I wanted to add some items into the crate that would draw the attention of the viewer, as this would help add life to the scene rather than the crate being empty and not fulfilling its purpose. I used the EP Curve tool in the creation of the bottles, as this allowed the creation of a smooth curve rather than attempting to make a bottle shape out of a cylinder primitive, which would be less appealing to the eye. My original plan saw the crate filled with duplicates of the same bottle shape, yet I wanted to reinforce the skills that I had learnt with the NURBS tools and poly modelling in my previous projects, creating two plates and two cups from various primitive shapes.
OUTCOME
Overall, I’m happy with my high poly crates and my improvement on the low poly crate. The low poly crate has a significantly lower polycount than the high poly counterpart, which would be useful for making game-ready assets and baking materials.
I’d like to improve further by including smaller details onto the sides of the crate and onto the items within the crate, such as adding wood grain to the crate, adding bolts to the metal supports and details such as labels and corks to the bottles.
Referenced Material:
Autodesk (2021) Mirror Options | Maya 2022 | Autodesk Knowledge Network. knowledge.autodesk.com. Available online: https://knowledge.autodesk.com/support/maya/learn-explore/caas/CloudHelp/cloudhelp/2022/ENU/Maya-Modeling/files/GUID-E66AE3D8-3B9C-4D4E-9A3E-5BDAFCD67F1D-htm.html [Accessed 7 Mar. 2022].