UV Mapping is often defined as the process of projecting a 2D image onto the surface of a 3D model (Deschatelets, 2016). To be able to apply textures to a model, the model requires UV maps and to have the different faces of the model separated from the others to ensure that the texture will not overlap.
UNDERSTANDING UV MAPPING
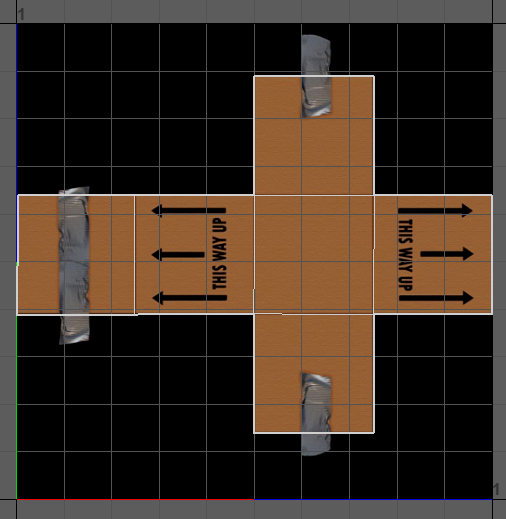
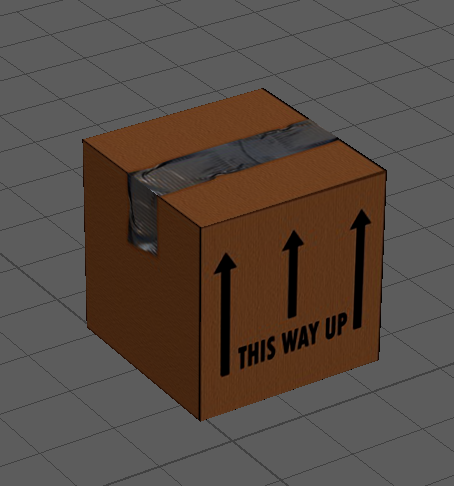
Prior to this project, I had a very limited understanding of the process of UV mapping. To understand it further, we had an initial task of applying a cardboard box texture to a cube primitive, which would help teach the initial basics of UV mapping and to ensure that the textures fit the respective faces.
Using the box texture provided, I applied it to the cube primitive. This was initially displayed incorrectly, as the UV shell was not aligned to the image of the box, making the box display sections of black that were surrounding the actual texture itself. To fix this, I had to make use of Maya’s cut and sew function within the UV editor to manually edit and manipulate the UV map to fit the image texture, ensuring to drag the UV points to the edges of the texture so the faces only displayed the cardboard texture.
UV MAPPING THE LOW POLY CRATE
From this, we were to use Maya’s UV editor to UV map the low poly crate made in the previous week. As the crate was a relatively simple shape, I made use of Maya’s automatic unwrap tool. This broke the crate down into the various panels seen below, which I then edited the layout to display in a manner that I could take the file into Substance Painter.

Referenced Material
Deschatelets, B. (2016) Understanding UV Mapping and Textures. Spiria. Available online: https://www.spiria.com/en/blog/desktop-software/understanding-uv-mapping-and-textures/.