With Compton’s base model and clothes blocked out, I could begin to add the finer details to the character mesh to amplify Compton and her backstory further, such as the vest that is in the concept image and the thigh holster.
IMPROVING THE HAIR MESH
One of the areas I wanted to focus on initially during this stage was Compton’s hair, as I had previously used the Dam Standard brush at a small size and in both its subtractive and additive forms to give the illusion of hair strands. I felt as though this worked for a more stylised character concept, and as I wanted to keep Compton within the bounds of semi-realism, which decided that it would be best to improve the hair mesh.
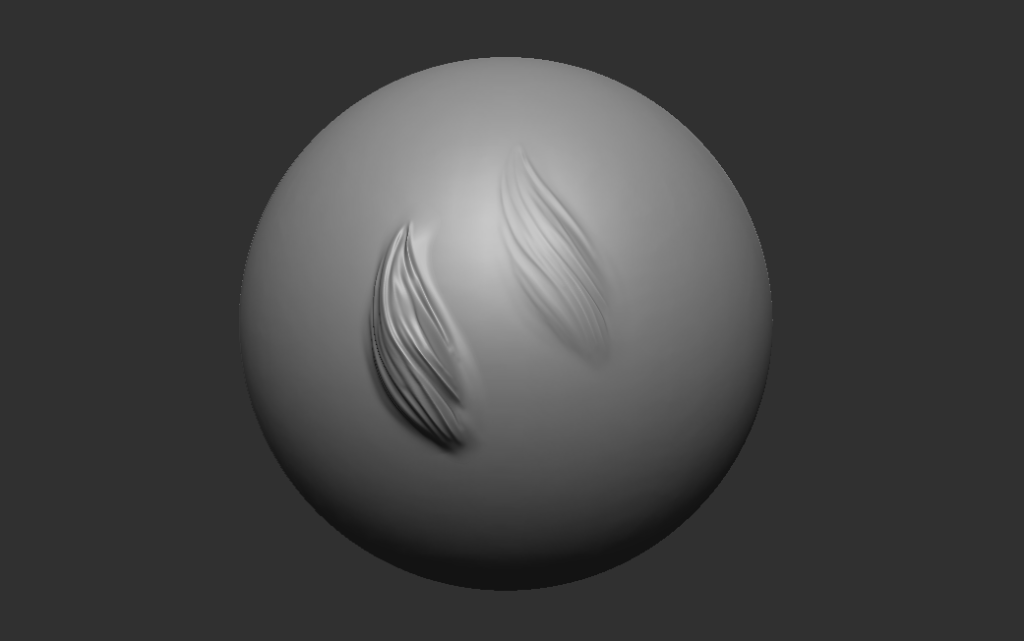
With the use of a Hair IMM Brush from the ArtStation Marketplace (Chevalier, 2021), I began to build layers of hair strands on the hair mesh by changing the mode to Drag Rect. The strength of the brush upon opening it was set to 100 – which when applied to the mesh created clean, defined lines, yet also added volume to the mesh from where it had been placed, ultimately deforming the desired shape of the mesh into something completely different. Upon realising the effect of the brush on the hair mesh, I reset the mesh to its previous state using the Undo History bar and lowered the brush strength to 25%, which removed the majority of the volume being added to the mesh. In addition, changing the strength to 25% also changed the clean and defined lines to a subtler, less intense state, which I feel closely mimicked real-life hair strands being layered over each other.
CREATING THE VEST
My next task was the creation of Compton’s vest/body armour, as the vest is a key part of Compton’s character visual design that can be seen in the concept art and in her profession as a mercenary. I wanted to dedicate a larger amount of time to its creation, ensuring that I could create something that felt believable for the character.
Initially, I used ZModeler to extrude faces from an appended cube in order to achieve the shape of the vest, as I experimented with the idea of keeping the vest relatively polygonal to convey to the viewer that this was an item that has a harder surface than the surrounding pieces of clothing. By appending a Cube primitive to the model, I was able to use the QMesh function to extrude faces to create the base form of the vest. I was not entirely happy with this creation, as I had to additionally make holes using the Live Boolean function for Compton’s arms to fit through rather than leaving them clipping through the cube’s mesh. As I was not entirely set on this version of the vest, I decided to create a second vest using the mesh extract method that I had used previously when creating Compton’s clothes, comparing the two designs to determine which vest best suited the character model, ultimately settling on the second iteration.
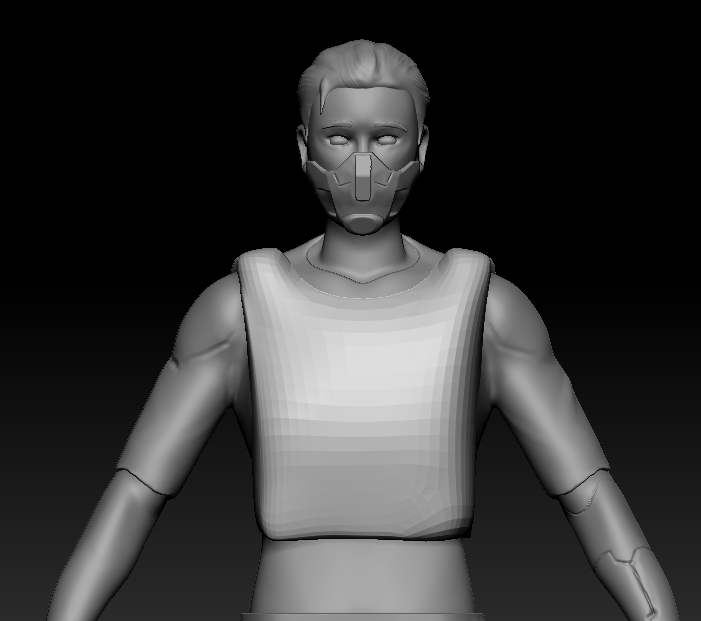
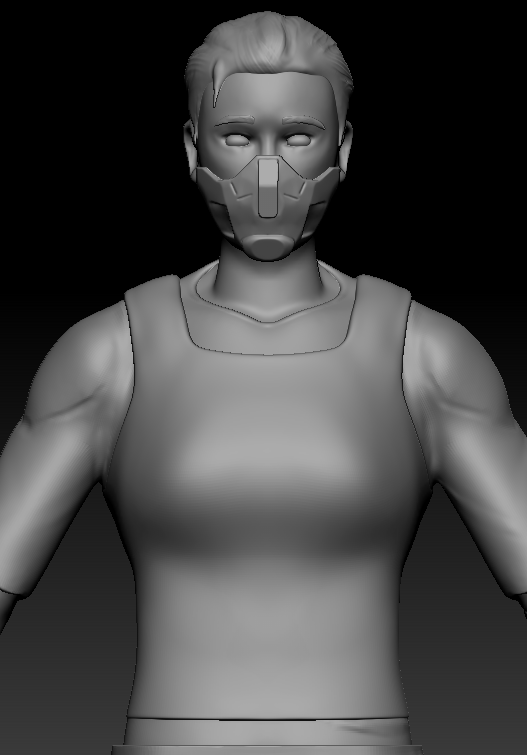
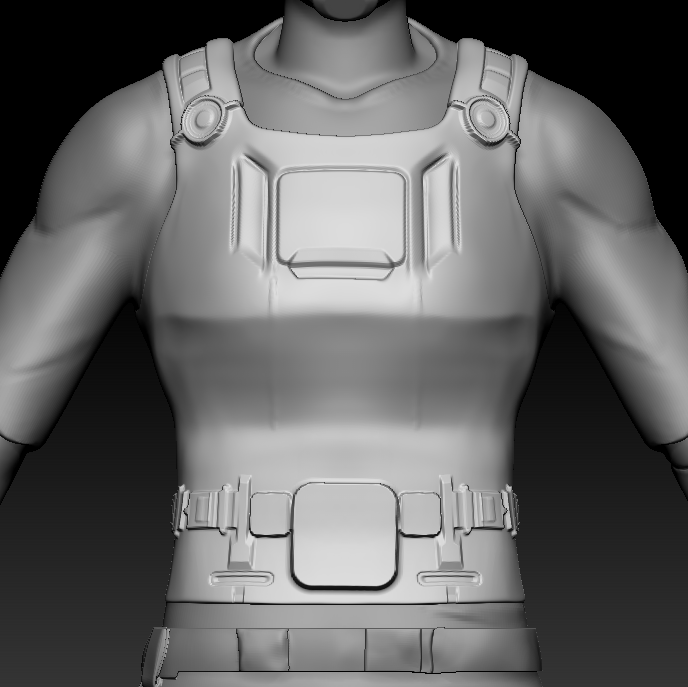
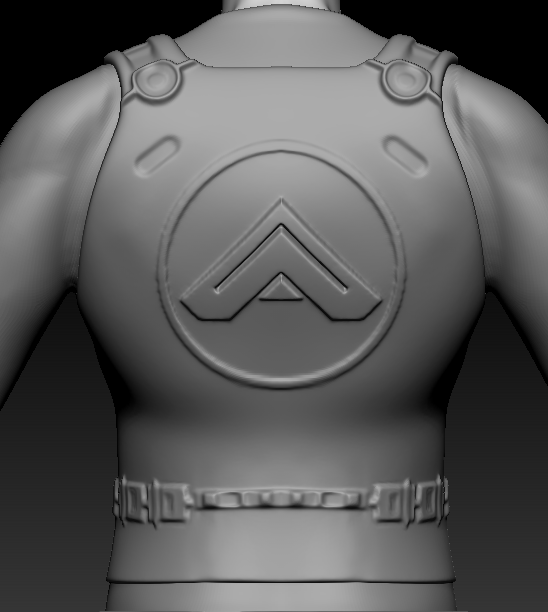
Additionally, I decided to change an element of the vest in order to keep the silhouette clean. As seen in the original concept art for Compton, the vest featured four belts that joined at the raised centre of the vest, taking inspiration from armour plating and tactical vests that are used by soldiers and officers in their day-to-day lives to protect them. I used the extract mesh method to create the belts, as this would allow me to have the belts relatively close to the mesh by altering the mesh thickness without making the silhouette too complicated. When creating the raised section of the vest, I started to realise that I was losing the curvature of the silhouette on the side profile, which in turn affected the readability of the character model. Furthermore, feedback that I had gained from my friends regarding this issue said that this vest design made the silhouette more androgynous from the silhouette of the torso becoming squarer, whereas my initial base model visually read as a female figure. With this in mind, I started to change the design of Compton’s vest. I decided that the best action to take would be removing the raised section and revise the design in order to keep the silhouette of Compton readable.
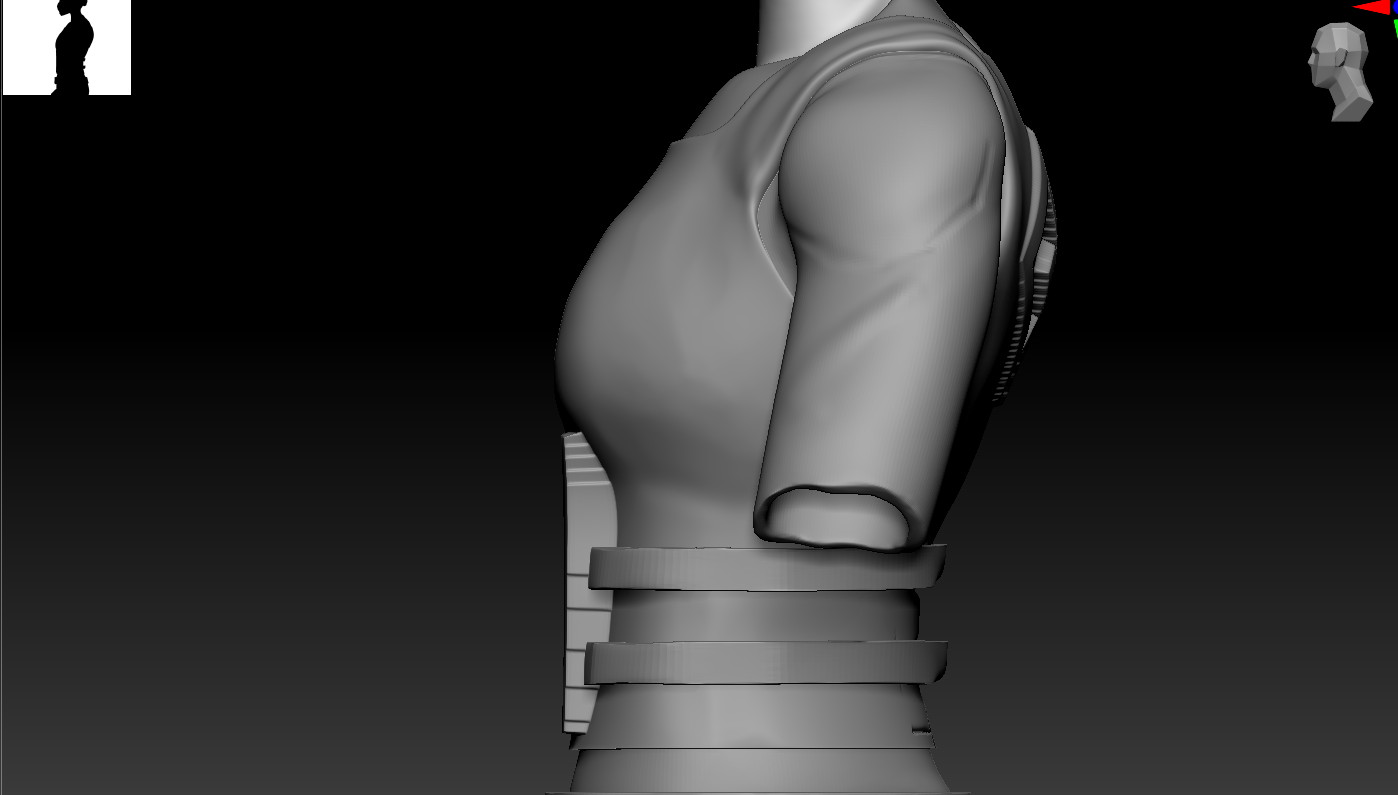
Through a combination of Hard Polish, Trim Dynamic and Clip Curve, I started to make the vest more angular to represent the vest being a harder surface than the surrounding clothing and accessories. Clip Curve and Trim Dynamic were predominantly used on the topmost section of the vest to create a clean-cut surface, whilst Hard Polish was used on the lower half of the vest due to clip curve becoming destructive to the mesh due to the angle. I also realised during this process that I had polygons that were not being used optimally. Both the base mesh for the torso and legs that were used to create the top, vest and trousers were covered and not visible to the eye of the viewer, which unnecessarily added to the overall polygon count. Upon removing both the mesh for the legs and the torso, the polygon count had lowered by around 3 million polygons.
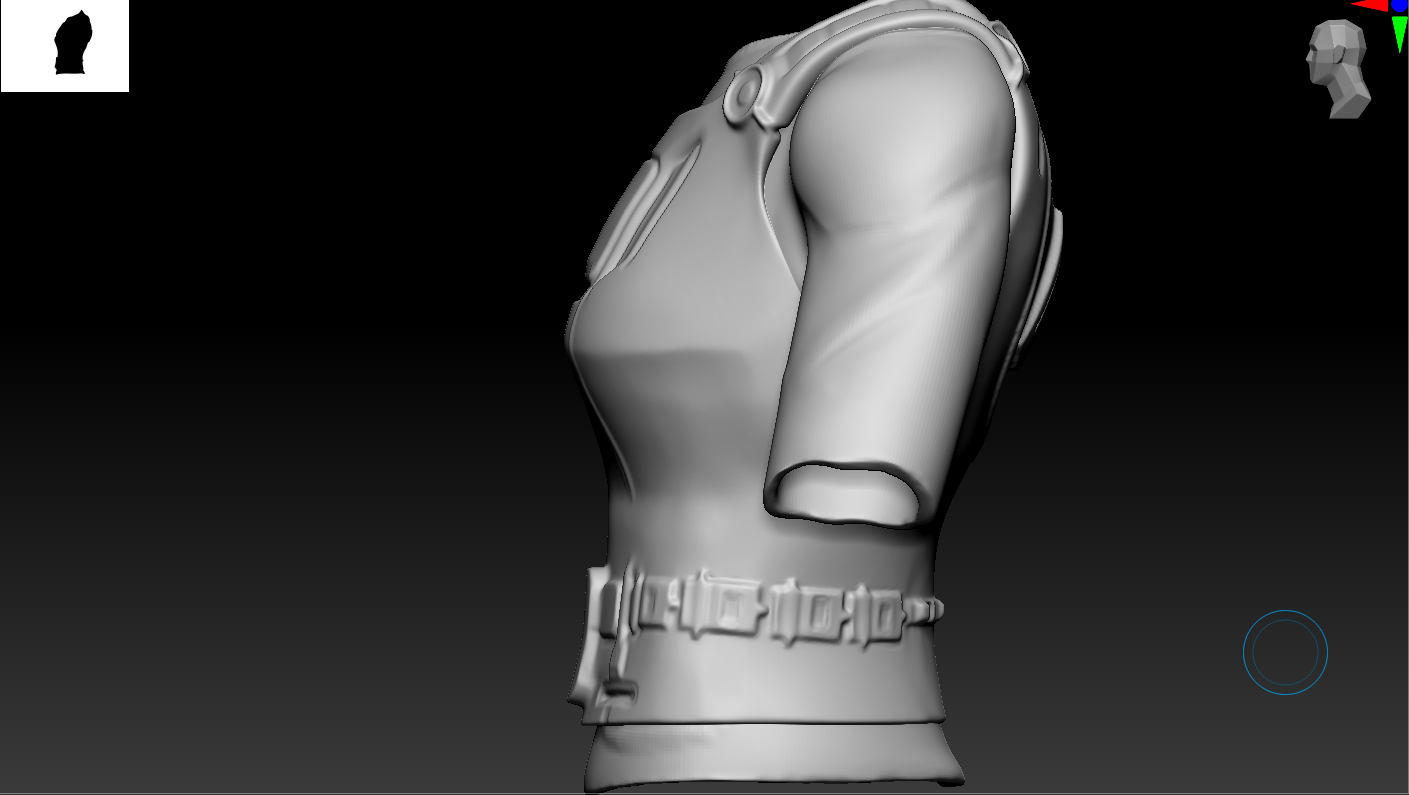
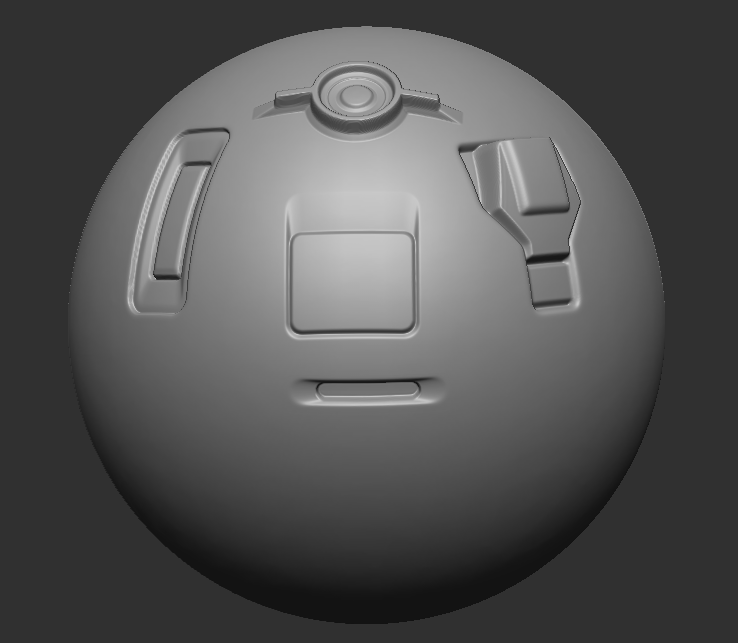
With the aid of a Cyberpunk VDM brush pack from the ArtStation marketplace (Rabarskyi, 2021), I found a mesh within the pack that could act as a substitute for the raised section of the vest without impacting the silhouette. I also adjusted the design of the belts, as the previous design no longer worked with the revisions made and stood out against the design; Whilst searching through the aforementioned brush pack, I found a mesh that when placed repeatedly around the vest itself would give the impression of a futuristic belt, which would lend itself to the “world” that the character would be inhabiting. As the character is designed to be in a cyberpunk/dystopian-styled game, there were certain elements of her design that I could have creative freedom with and not be entirely tied to a real-world counterpart, leading to the addition of panel elements to the front of the vest.
I also took onboard some of the early feedback when detailing the back of Compton’s vest. When comparing the back of Compton’s vest that is visible below to the one that is featured in her initial concept art, there is more detail around the straps of the vest, indented sections in the mesh itself and a large logo to break up the mesh and add variation to the surface. I followed a tutorial by Nexttut, an account that I have been following for a fair amount of time, to create the logo seen below in Photoshop and how to apply the logo as an alpha onto my mesh (Nexttut, 2022).
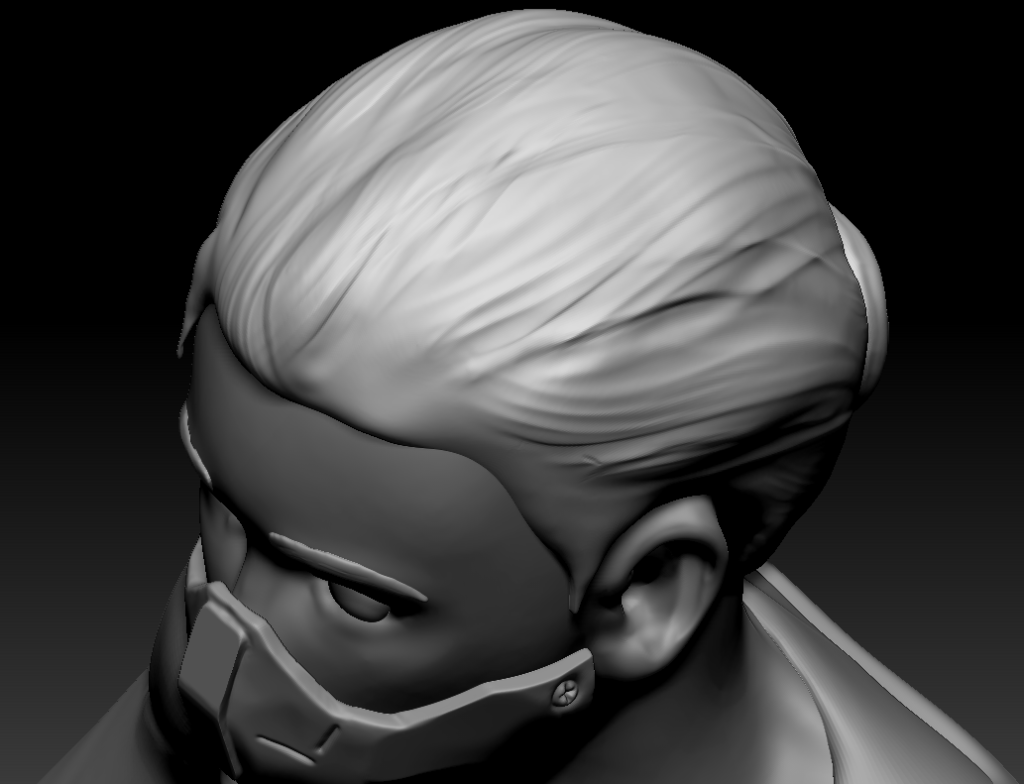
DETAILING COMPTON’S ARM AND MASK
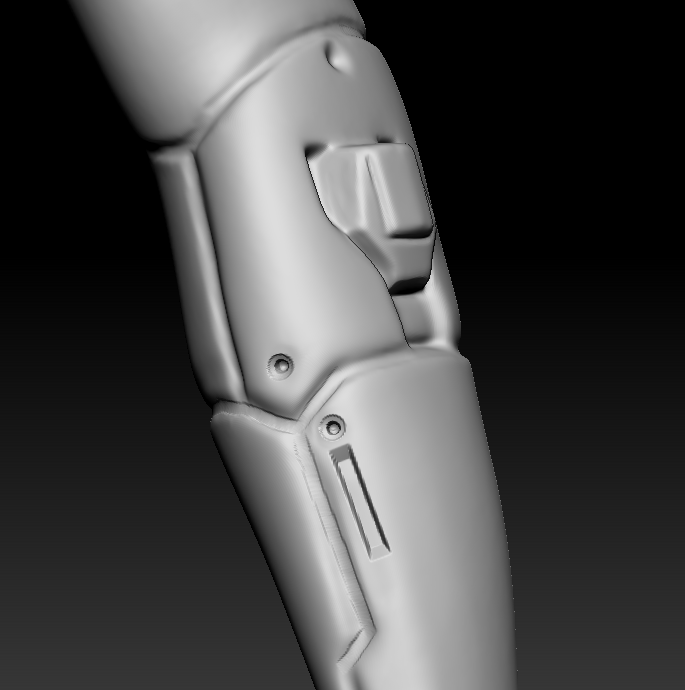
I also further detail to Compton’s mask and to her cybernetic arm. Compton’s cybernetic arm from a narrative standpoint is to help her in her line of work as a mercenary, giving her the upper hand in combat engagements and any of her assignments, as an arm that is not made of flesh and bone is significantly harder to break. As mentioned in the “Blocking Out and Creating Clothes” post, I wanted Compton’s arm to have elements that are raised and indented in a similar manner to how body modifications are represented on V in Cyberpunk 2077.
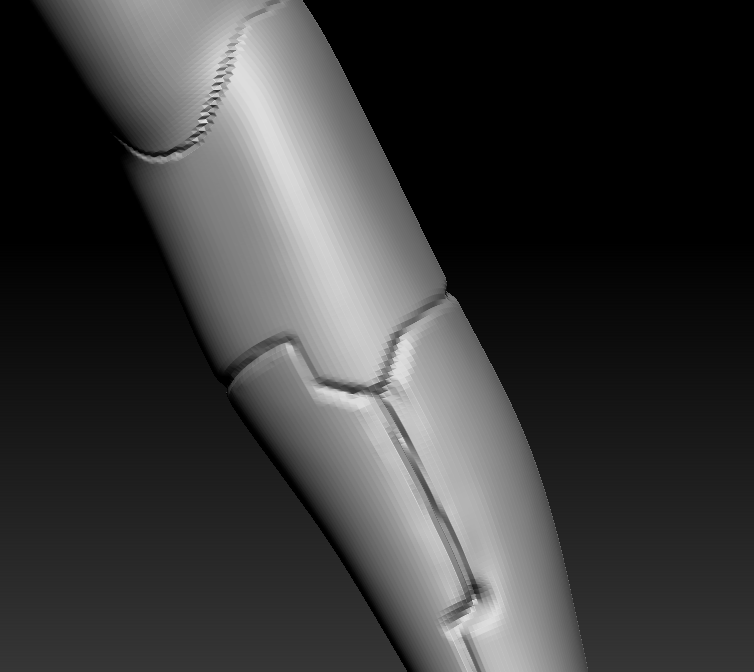
The first step taken in adding further detail to the arm was to use Hard Polish on the arm to make the arm appear less organic and more mechanical. I had to experiment with the strength value of Hard Polish initially, as the default value was set too high and deformed the mesh on application, but ultimately found that between 20 and 25 gave the desired effect. I previously used DamStandard when creating the indentations to represent the panels of the arm and using trim dynamic in an attempt to widen the indent, and decided to define it further; By using the Clay Buildup brush in its subtractive form, but with the strength lowered, I was achieving clean, straight lines that visually separated the different sections of the arm. Using the Cyberpunk VDM pack, I added further detailing, such as the double dots that looked akin to rivets and the larger extruded mesh in the centre of the forearm, which I imagined to be a quick-release switch for the panel below, releasing some form of a weapon, such as the Mantis Blades or Monowire from Cyberpunk 2077.
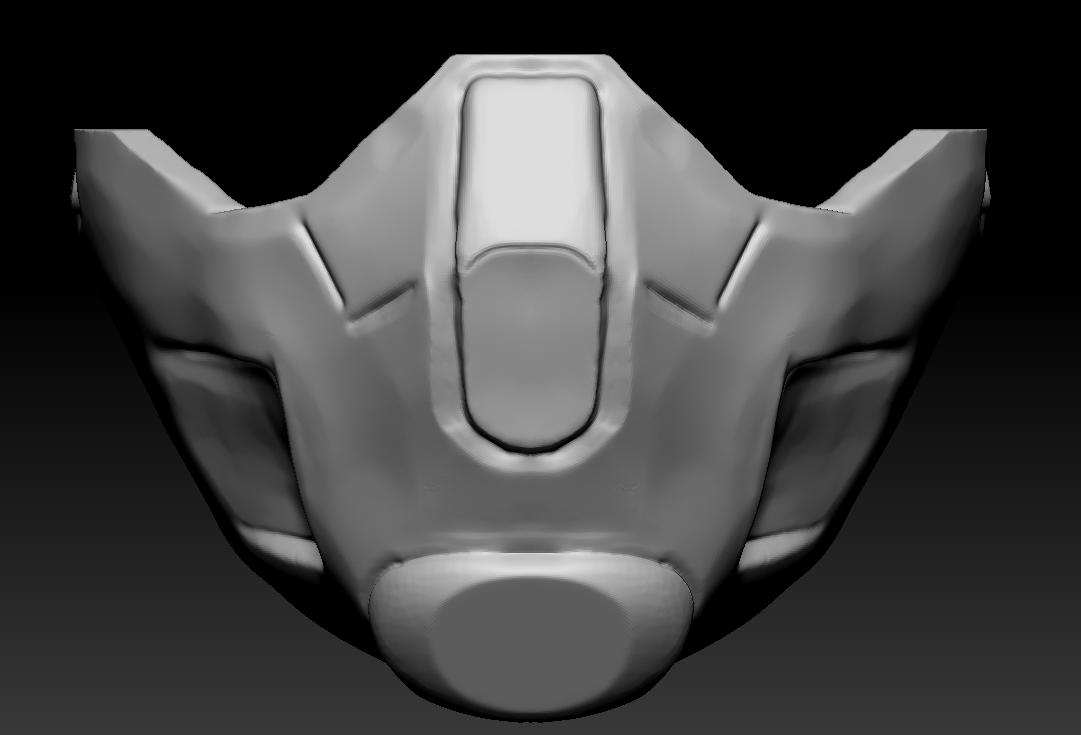
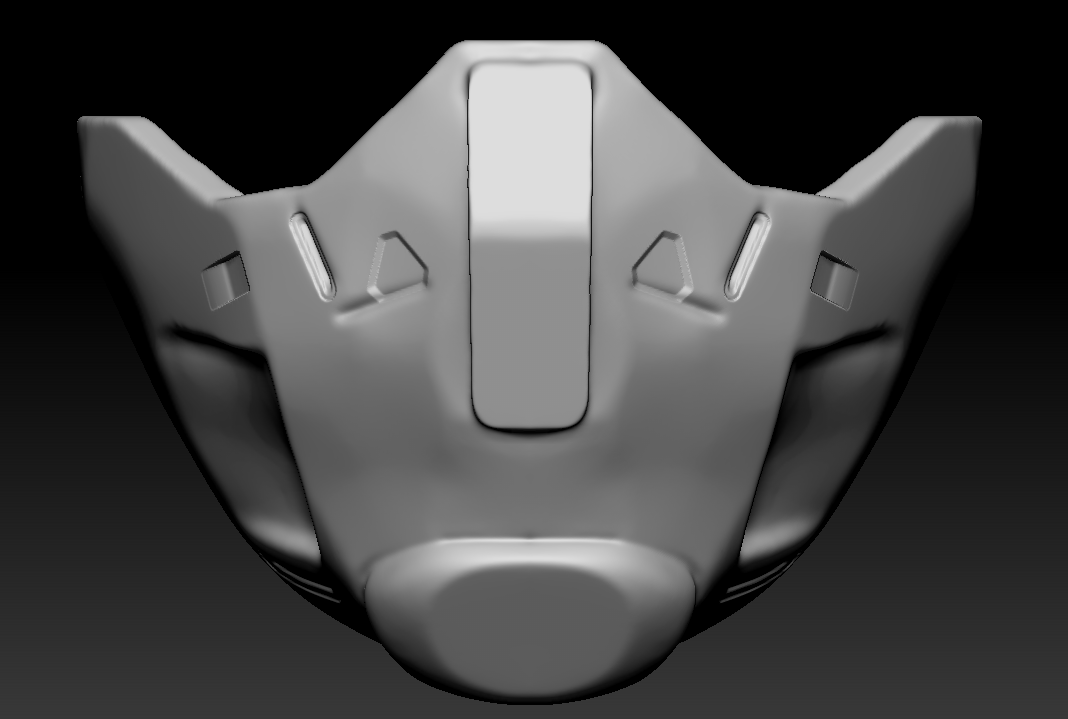
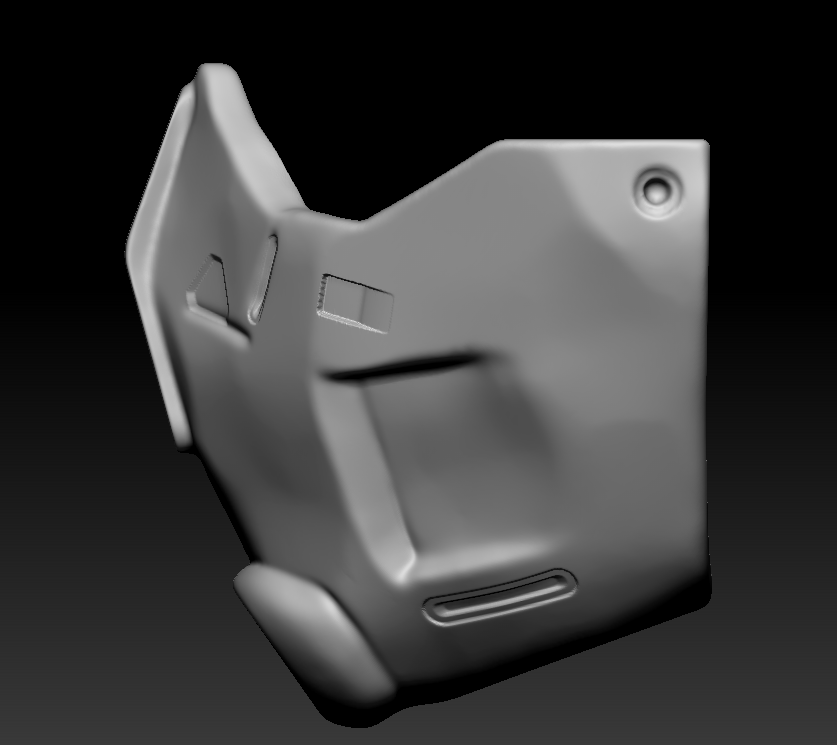
I also polished the design of the mask, making it considerably more angular and changed some minor elements. The mask design that was used when blocking out Compton was visibly softer in comparison to the refined design, as around the nose piece and the edges of the mask showed areas where I had used Trim Dynamic without accomplishing the desired clean transition between different angles and planes that is often seen on Hard Surface sculpts. I used Clip Curve predominantly to create the hard edges of the mask, masking off certain sections to ensure that the rest of the mesh would not be affected and Hard Polish to achieve the hard surface appearance. As a final touch to the mask, I added a few small details from the Cyberpunk pack to add variation to the surface, such as adding small rectangular indents on the sides of the mask to potentially act as ventilation or a speaker to project the voice of the person wearing it.
IMPROVING THE HOLSTER
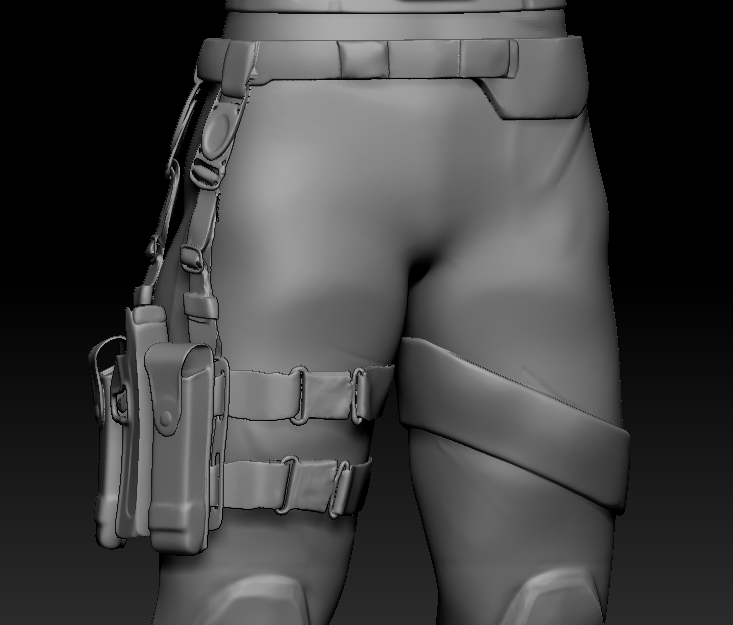
As I had improved the level of detailing on Compton’s torso and arms, it felt as though all of the detail on the model was on the top section of the model and very little on the lower half. I had some issues with the holster that I had created, as during the creation of the band that was wrapping around the thigh, two meshes were created – which when moving the exterior mesh also moved the mesh that had generated on the inside of the thigh. Additionally, when attempting to add details to the section in which a weapon would sit, such as adding stitching along edges and areas that would be frayed from frequent use, and then subsequently Dynamesh the mesh, the mesh was littered with large holes and spikes. The holes would not close, despite using the Pinch tool technique which had worked previously nor would the spikes in the mesh soften with the smooth tool.
I decided to ultimately remove the holster that I had created and replace it with a mesh from a Military Mesh pack from the ArtStation marketplace (Mohammadsaeed, 2022). When I appended the mesh to my project due to it being in the OBJ file format, the holster was significantly larger than needed, prompting me to scale the mesh down to an appropriate size. Ensuring that the mesh was an appropriate size to the character model made the character feel realistic, as the equipment was not comically oversized or too small which would potentially make the overall character feel disconnected from their backstory.
Referenced Material:
Chevalier, G. (2021) All For Hair. ArtStation. Available online: https://www.artstation.com/marketplace/p/zrvJ/all-for-hair.
Mohammadsaeed (2022) 30 Military Pack Base Mesh_Vol 03 ( Game Ready ). ArtStation. Available online: https://www.artstation.com/marketplace/p/lbyO1/30-military-pack-base-mesh-vol-03-game-ready.
Nexttut (2022) Create ZBRUSH Alphas! Amazing Trick! www.youtube.com. Available online: https://www.youtube.com/watch?v=YLMIOFL0QGw [Accessed 17 Dec. 2022].
Rabarskyi, A. (2021) Cyberpunk vol. 1 | 120 Hard Surface VDM Brushes for Zbrush. ArtStation. Available online: https://www.artstation.com/marketplace/p/W3Gor/cyberpunk-vol-1-120-hard-surface-vdm-brushes-for-zbrush.